


FDM 3D Printing for Beginners: From Filament Selection to Printing Your First Anime Figurine
 2025.12.19
  NextShapes,Standard PLA,3D Printing
  <1 minute
 ![]()
![]()
![]()

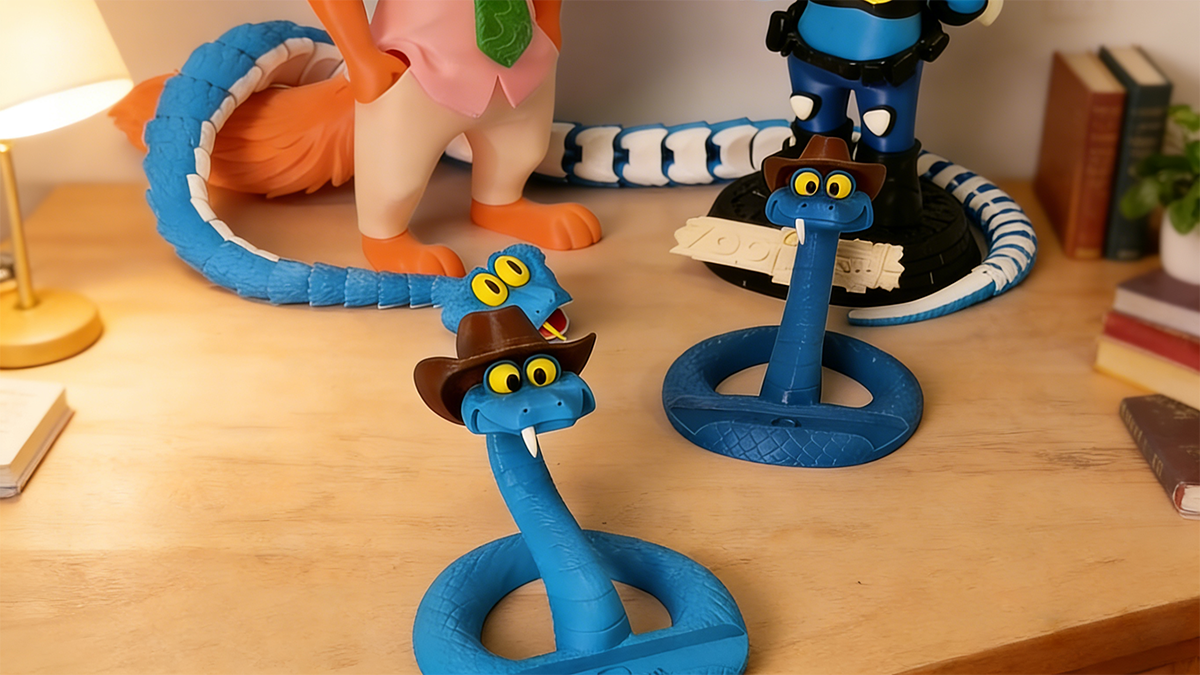
Fused Deposition Modeling (FDM) technology, known for its ease of use and affordability, has become the go-to choice for hobbyists and beginners in 3D printing. Not only can it create functional parts, but it also allows you to bring digital anime characters into the real world, opening the door to personalized creations for enthusiasts. This guide will walk you through how to use FDM technology, starting from selecting the right filament, to successfully printing anime figurines like characters from Zootopia.
Successful FDM printing begins with understanding the properties of the materials. Different filaments directly impact the final texture, strength, and ease of the printing process. Mastering the basics is the first step toward unlocking your creative potential.
![]()
Core Materials Breakdown: Choosing the Best “Paint” for Your Figurine
When printing figurines, the material is key to shaping the character. FDM filaments come in various types, each with unique characteristics. The following are the most commonly used filaments:
1.PLA: The Go-To Choice for Beginners and Color Enthusiasts
- (1)Properties: PLA is easy to print with, has low warping, and produces minimal odor. It offers a wide range of color options, including basic colors, gradients, fluorescent hues, and silk finishes, making it great for accurately replicating the visual design of characters.
- (2)Best Use: Ideal for printing display figurines and desk ornaments, where strength isn't a primary concern. For example, PLA is perfect for printing Judy Hopps’ blue police uniform or Nick Wilde’s vibrant orange fur in Zootopia, delivering rich, saturated colors.
2.PETG: A Balance Between Ease of Use and Durability
- (1)Properties: PETG combines the ease of PLA with greater toughness and durability. It has better layer adhesion, making the printed models more resistant to impact and wear, ideal for more complex parts.
- (2)Best Use: Suitable for figurines with small parts or models that might be handled. For instance, PETG works well for printing Nick Wilde’s long, delicate tail or the sloth “Flash’s” support, minimizing the risk of breakage.
3.Composite/Effect Materials: Adding Special Textures to Your Figurine
- (1)Properties: Composite materials (like wood or metal-filled filaments) or effect PLA (such as matte or silk finishes) add unique visual and tactile qualities to your figurine.
- (2)Best Use: Ideal for printing parts with special textures. For example, matte PLA can simulate the concrete walls of Zootopia's buildings, while silk PLA can replicate the smooth textures of a character's clothing.
From Model to Physical Object: Key Steps and Tips for Printing Your Figurine
Transforming your favorite character model into a physical object involves several key steps, each of which will directly affect the final print quality:
- 1.Obtaining and Preparing the Model: You can find high-quality model files by searching on model-sharing platforms or communities. After downloading the model, use slicing software to check and repair any issues, ensuring the model is error-free.
- 2.Slicing Settings: Proper slicing settings are crucial for print quality. For figurines, it’s recommended to use a lower layer height to ensure finer surface details and reduce visible layer lines. Additionally, you should add supports where necessary, particularly for overhangs such as character arms, ears, or other parts with angles greater than 45 degrees.
- 3.Challenges and Solutions During Printing: Common issues when printing figurines include overhangs (such as the large ears of Judy Hopps) and fine point stringing. These can be mitigated by improving cooling, adjusting print speed, or tweaking layer temperatures. Ensuring that the filament stays dry is also key to avoiding rough surfaces and reduced strength in the final model.
Post-Processing: Making Your Figurine Shine
The post-processing phase is crucial for enhancing the appearance of your figurine and turning it from a “printed piece” into a “collectible masterpiece”:

- 1.Removing Supports and Sanding: Carefully remove all support structures, then use sandpaper with varying grits to smooth the surface and eliminate layer lines. Start with coarse sandpaper, then gradually transition to finer grit until the surface is completely smooth.
- 2.Painting and Finishing: This is the step where you bring your figurine to life. Even if you’ve chosen a colorful filament, painting is often necessary to add details, contrast, and realism. Use model-specific water-based paints for either hand-brushing or spraying. Carefully painting details, such as the eyes, fur, or small features, will bring the character to life.
- 3.Surface Protection: After painting, apply a layer of matte or glossy clear coat to protect the paint, enhance durability, and unify the texture of the figurine. This also prevents scratches and UV damage over time.
Start Your Creative Journey
FDM 3D printing technology has significantly lowered the barrier to creating anime figurines, enabling every enthusiast to craft their favorite characters. From understanding material properties, mastering slicing techniques, to executing fine post-processing, the entire process is a fun and rewarding creative journey.
Now, you can start by printing a simple character and gradually build up your experience. As your skills improve, you’ll not only be able to replicate classic characters but also design and print your own unique ones.

